Installing shower plumbing from scratch is one of the more rewarding home improvement projects you can take on, but it is also one of the least forgiving. Pipes hidden behind a finished wall need to be leak-free, code-compliant, and perfectly aligned before a single tile goes up. Whether you are building a brand-new bathroom, finishing a basement, or gutting an outdated space, understanding the full process helps you plan smarter, avoid expensive mistakes, and know when to bring in a professional. This guide walks you through every stage of a new shower plumbing installation, from rough-in layout to final pressure testing.
Plan Your Shower Layout Before Touching a Pipe
Every successful shower installation starts on paper, not at the hardware store. Before you cut any pipe or open up a wall, you need a clear plan that accounts for water supply lines, drain location, venting, and the position of your valve, showerhead, and body sprays. Rushing this stage is how homeowners end up with drains that do not line up, valves installed upside down, or hot and cold supply reversed behind tile.
Start by measuring your shower footprint and marking the drain location on the subfloor. The drain must sit directly below where it will emerge through the shower pan or tile base. From there, map the supply lines back to the nearest accessible hot and cold mains, and identify how you will vent the drain according to local code. If you are unsure about code requirements in Pennsylvania, a consultation with an experienced local plumbing company can save you from costly permit issues later.
Tools and Materials You Will Need
Having the right supplies on hand prevents frustrating trips to the store mid-project. For a typical new shower rough-in, plan on gathering:
- Half-inch PEX or copper for hot and cold water supply lines
- Two-inch PVC or ABS pipe and fittings for the drain and trap
- A pressure-balancing or thermostatic shower valve
- Shower drain assembly with a compatible shower pan
- Pipe cutters, a PEX crimping or expansion tool, PVC primer and cement
- Level, tape measure, stud finder, and a reciprocating saw
- Teflon tape, pipe dope, and a pressure-testing gauge
Double-check that your valve is compatible with the trim kit you plan to install. Mismatched rough-in valves and finish trim are one of the most common delays in bathroom remodels.
Step-by-Step: How to Install Shower Plumbing
Step 1: Install the Drain and Trap
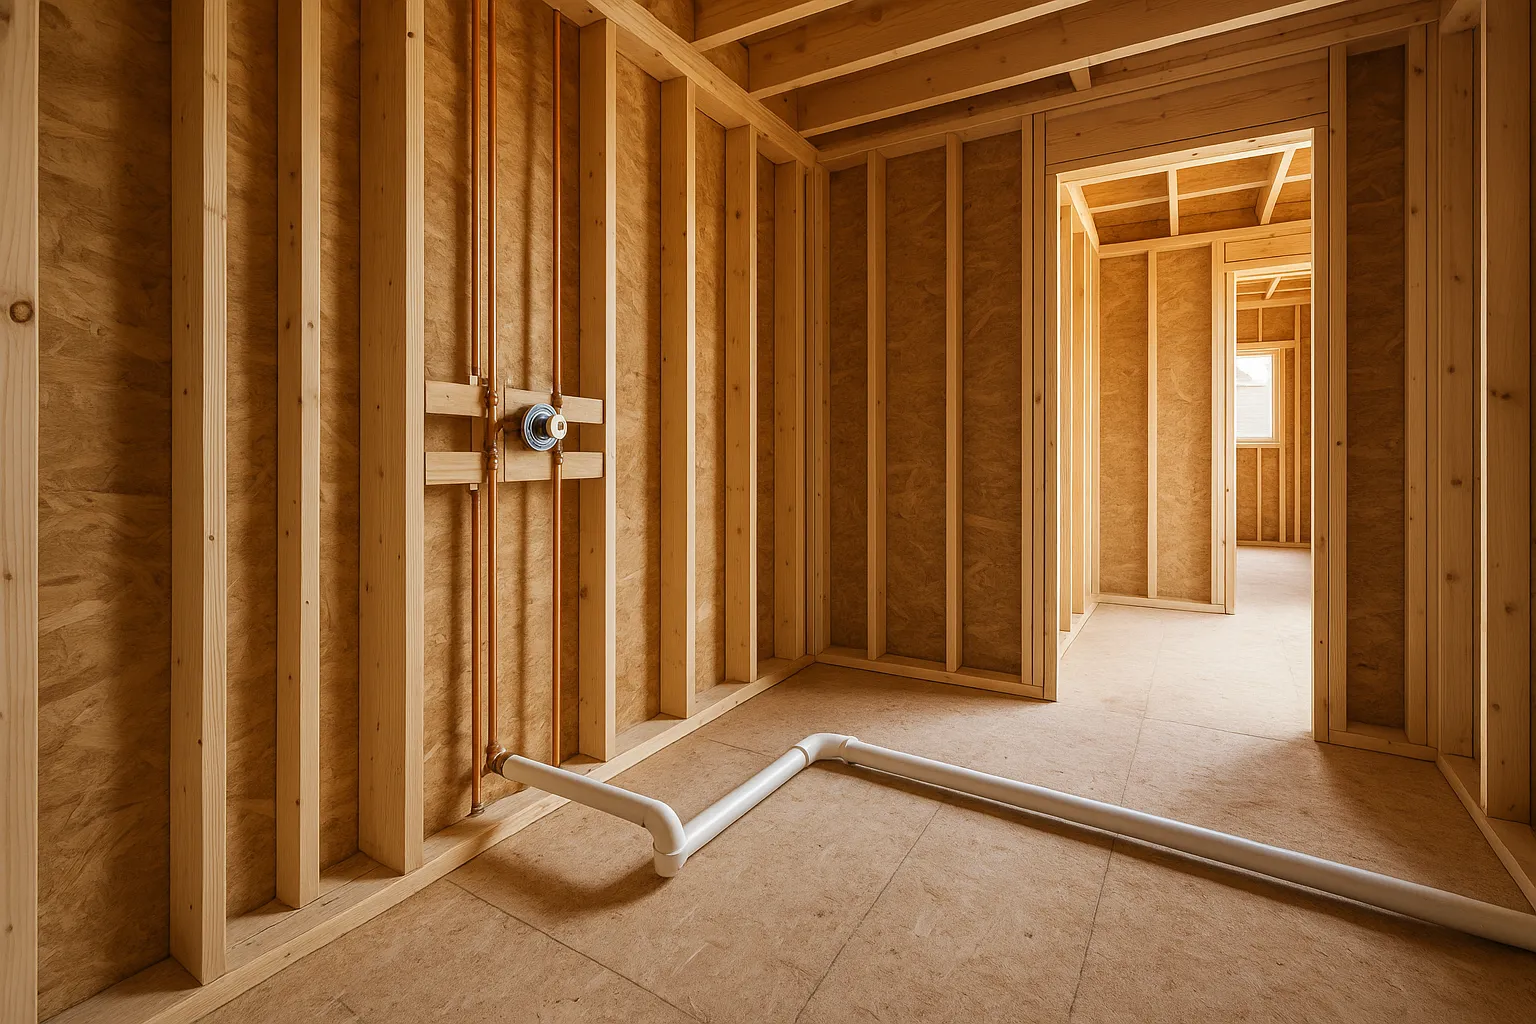
Begin with the drain because everything else works around it. Cut an access hole in the subfloor where the drain will sit, then dry-fit the P-trap and drainpipe. The trap should sit level, and the drainpipe needs a minimum quarter-inch-per-foot slope toward the main waste line. Once you confirm the fit, glue the joints with PVC primer and cement, working quickly since the bond sets in seconds. Make sure the drain flange ends up flush with the finished shower base height, not the subfloor.
Step 2: Run the Vent Line
Every drain needs a vent to prevent siphoning and sewer gas from entering the home. Most local codes require the vent to tie into the main stack or extend independently through the roof. Install the vent above the trap weir and within the distance specified by your jurisdiction, typically five to eight feet for a two-inch drain. If you are dealing with persistent slow drains or gurgling sounds in your existing system, those symptoms often trace back to improper venting that was cut corners on during an earlier build.
Step 3: Rough In the Water Supply Lines
With the drain set, turn your attention to the supply lines. Shut off the water to the house and run half-inch hot and cold lines from the nearest main to the location of your shower valve. Keep hot on the left and cold on the right, consistent with standard plumbing convention. Secure the pipes every few feet with insulated clamps to prevent banging and movement inside the wall cavity. If you are working with older galvanized or polybutylene plumbing, this is a great time to budget for whole-house repiping rather than patching new onto failing pipes — a scenario we often see in older Bucks County homes that benefit from a trusted neighborhood plumber.
Step 4: Install the Shower Valve
Mount the shower valve at a comfortable height, usually around 42 to 48 inches above the finished floor, and secure it to a wooden cross brace between two studs. Double-check the orientation — the valve body is marked with arrows or labels for hot in, cold in, shower up, and tub out (if applicable). Use the plaster guard that came with the valve to protect it during drywall and tile work, and to confirm the correct depth for the finished wall surface.
Step 5: Connect the Showerhead Riser
Run a half-inch line from the shower-up outlet of the valve to the showerhead location, typically 72 to 80 inches above the finished floor. Terminate the riser with a drop-ear elbow anchored securely to a cross brace so it does not flex when the showerhead is tightened. This small detail is the difference between a professional-feeling installation and a wobbly showerhead that loosens every few weeks.
Step 6: Pressure Test the System
Before any insulation or drywall goes back up, pressure-test your work. Cap all open ends, turn the water back on, and charge the supply lines to household pressure. Inspect every joint with a dry hand or paper towel, looking for drips or sweating. For the drain side, fill the trap and pour water down the line while watching for leaks at every joint. Most inspectors also require this test before they will sign off on the rough-in.
Common Mistakes to Avoid
Even careful DIYers run into the same handful of problems on shower installations. Watching for these early saves you tear-out work later:
- Setting the drain at the wrong height for the finished pan or tile thickness
- Forgetting to slope the drainpipe properly, causing slow drainage and buildup
- Skipping the vent or undersizing it, which leads to stubborn drain clogs and backups over time
- Reversing hot and cold supply lines at the valve
- Failing to pressure test before closing up the wall
If you find yourself second-guessing any of these steps, it is almost always cheaper to bring in a professional than to tear out tile and drywall to fix a hidden mistake.
When to Hire a Professional
Some shower installations fall comfortably within a homeowner’s skill set, especially when you are simply swapping a valve in the same location. New installations involving fresh supply lines, a new drain, or relocation of fixtures are a different story. If your project includes any of the following, hiring a licensed plumber is the smart move:
- Cutting into finished floors or load-bearing walls
- Rerouting supply or drain lines through concrete slabs
- Installing a steam shower, body spray system, or thermostatic valve
- Working in a home with older or mixed-material piping
- Pulling permits or scheduling a municipal inspection
For homeowners dealing with older drain lines or frequent backups alongside a bathroom remodel, combining your rough-in with professional drain clearing and inspection is often the most cost-effective path forward. It also helps to schedule your work with a full-service plumbing team in the Horsham area that can handle unexpected issues that surface once the walls come open.
Related Reading
Bathroom remodels often uncover deeper plumbing issues, from clogged lines to water heater concerns. Our article on how dirt and sediment contribute to stubborn drain blockages is a helpful companion piece if you are dealing with recurring slow drains in the rest of the house. You may also want to explore our upcoming guide on choosing the right water heater size for a remodeled bathroom, which ties directly into how your new shower will perform day to day.
Get Expert Help from FKRIV Plumbing & Heating
A new shower should be the highlight of your bathroom, not a source of leaks, backups, or callback repairs. If you are planning a new installation or running into complications partway through, the team at FKRIV Plumbing & Heating Inc. has four generations of master-plumber experience serving Bucks County and the surrounding area. Call (215) 874-0592 to schedule a consultation and get your project started on solid ground.