Installing a toilet sounds simple until water starts pooling around the base the first time you flush. A leak-free setup depends on more than just bolting the fixture to the floor. It comes down to preparing the rough-in correctly, choosing the right supply line, seating the wax ring properly, and tightening every connection to the right tension. Whether you are swapping out an old toilet for a modern low-flow model or roughing in a new bathroom from scratch, the fundamentals are the same.
This guide walks you through the full process so you understand what to expect, what tools you need, and where homeowners most often run into trouble. If you hit a problem mid-installation, a trusted local plumbing team can step in to finish the job without the risk of a hidden leak under your subfloor.
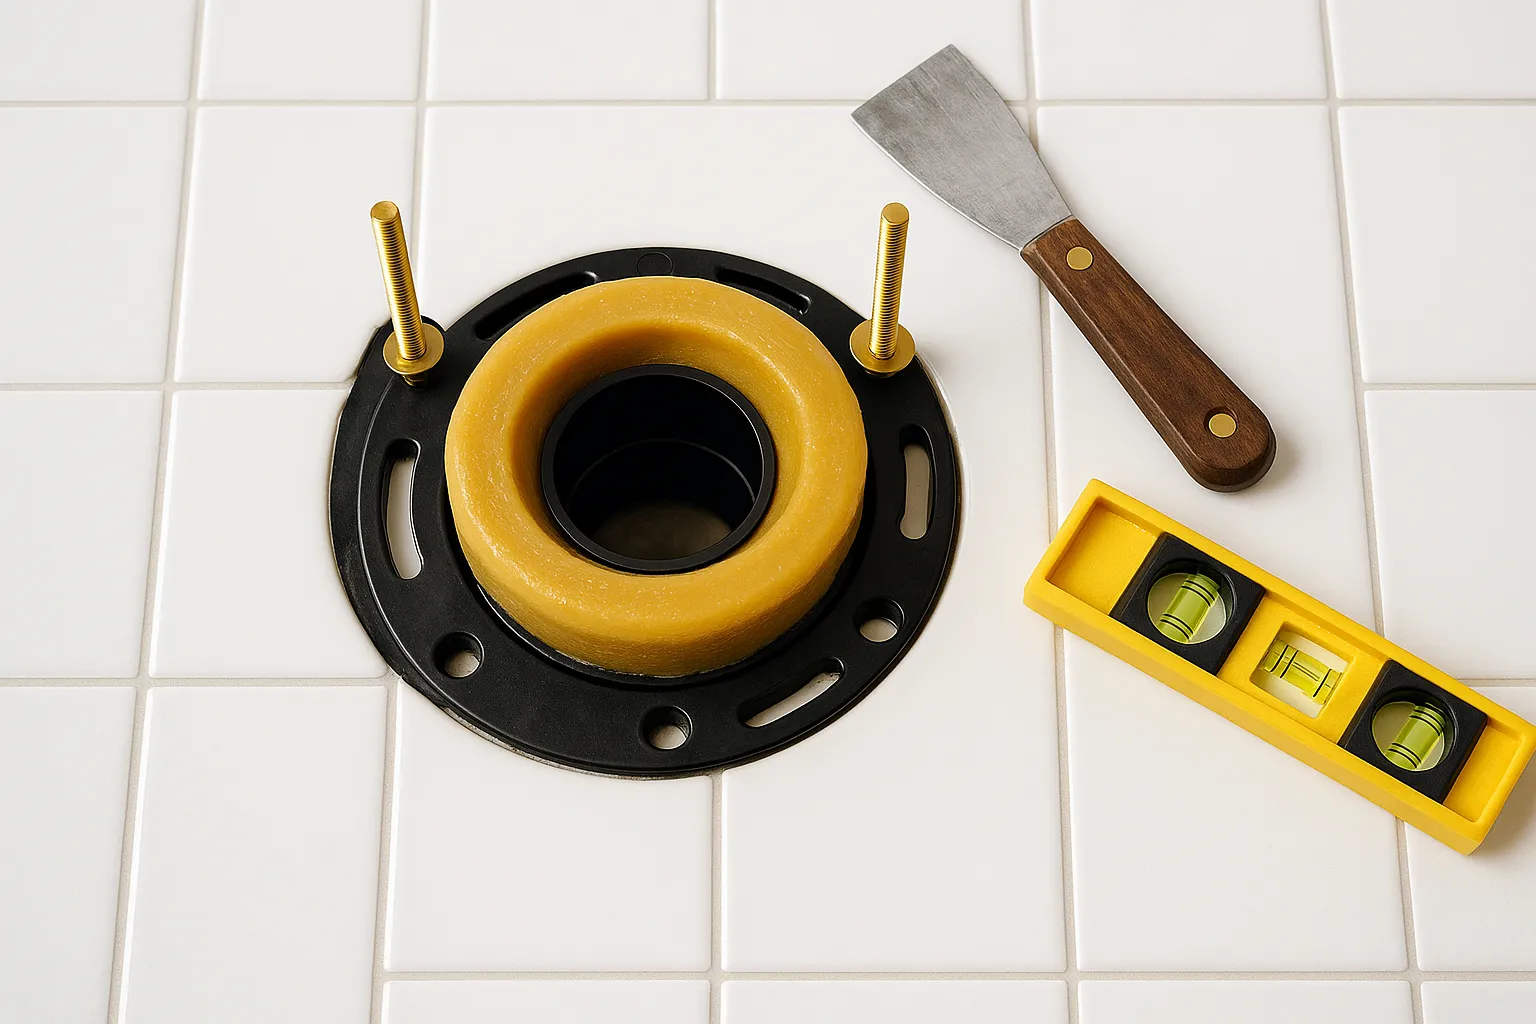
Tools and Materials You Need Before You Start
Having everything on hand before you turn off the water prevents the most common installation headache: standing in a hardware store aisle with a half-installed toilet at home. Gather these items first:
- Adjustable wrench and a basin wrench
- Putty knife for scraping the old wax ring
- Level (a short torpedo level works well for the base)
- Hacksaw or close-quarters saw for trimming closet bolts
- New wax ring or waxless seal ring
- New closet bolts and plastic bolt caps
- Braided stainless steel supply line sized for your shutoff valve
- Toilet shims if your floor is uneven
- Clean rags and a shallow pan or old towels for residual water
If your current shutoff valve is corroded, stiff, or visibly leaking, plan to replace it before you install the new toilet. Trying to work around a bad valve almost always ends in water damage later, especially in older homes across Bucks County where galvanized supply lines are still common.
Understanding the Rough-In Measurement
The rough-in is the distance from the finished wall behind the toilet to the center of the closet flange on the floor. Most modern toilets are built for a 12-inch rough-in, but older homes sometimes have 10-inch or 14-inch rough-ins. Measure before you buy a new toilet. Installing a 12-inch model in a 10-inch space means the tank will not sit flush against the wall, and the result looks unfinished even before you get to function.
Also check the flange itself. It should sit flush with or slightly above the finished floor, never recessed below it. A recessed flange is one of the top causes of recurring leaks because the wax ring cannot form a proper seal. If yours is below grade, a flange extender is the correct fix, and one of many hidden issues our experienced plumbers routinely identify when homeowners call after a failed DIY install.
Step-by-Step Toilet Installation Process
1. Shut Off the Water and Drain the Old Toilet
Turn the shutoff valve clockwise until it stops. Flush the toilet and hold the handle down to drain as much water as possible from the tank. Use a sponge or shop vacuum to remove the rest of the water from both the tank and the bowl.
2. Disconnect and Remove the Old Toilet
Disconnect the supply line, then unbolt the tank from the bowl if you want to remove it in two pieces (easier on your back). Remove the bolt caps, loosen the closet bolts, and gently rock the bowl side to side to break the wax seal. Lift straight up.
3. Clean the Flange and Inspect the Subfloor
Scrape off every trace of the old wax ring with a putty knife. Stuff a rag into the drain opening to block sewer gas while you work. Inspect the subfloor for soft spots, staining, or rot. A soft floor under a toilet is a red flag that a slow leak has been doing damage for months or years, and the repair should happen before the new toilet goes down.
4. Set the New Closet Bolts and Wax Ring
Slide new closet bolts into the flange slots and snug them in place with the plastic washers. Press the wax ring onto the horn on the bottom of the bowl (this is easier than placing it on the flange, and it stays put when you lower the toilet). If you are installing over a tile floor that sits higher than the flange, use a wax ring with a built-in plastic horn for a deeper seal.
5. Lower the Toilet and Tighten the Bolts
Lower the bowl straight down, guiding the closet bolts through the base holes. Once the bowl touches the floor, press down firmly with your full body weight to compress the wax ring. Do not rock the toilet side to side, which deforms the seal. Add washers and nuts, then tighten each side a little at a time, alternating to keep pressure even. Stop as soon as the bowl feels solid. Overtightening cracks porcelain, and a cracked base is not repairable.
6. Attach the Tank and Connect the Supply Line
Install the tank-to-bowl gasket, set the tank on the bowl, and tighten the tank bolts evenly. Hand-tighten the supply line to the fill valve and to the shutoff. Never use a wrench to overtighten the plastic nut at the fill valve. Turn the water back on slowly and watch for drips as the tank fills.
Testing for Leaks After Installation
The real test starts after the first flush. Flush several times in a row and watch three spots carefully:
- The supply line connection at the shutoff valve
- The connection between the supply line and the fill valve
- The base of the toilet where it meets the floor
A slow leak at the base may not show up for an hour or more. Put a dry paper towel around the base after the first flush and check it 30 minutes later. If it is damp, the wax ring is not sealed. Pull the toilet and start over with a fresh ring. There is no reliable shortcut for a failed seal.
Homeowners in the Yardley area sometimes find that the real issue is not the new install but an aging flange or warped subfloor from years of slow seepage, and those repairs require opening up the floor around the toilet.
Common Mistakes That Cause Toilet Leaks
Most toilet leaks trace back to a handful of predictable errors during installation:
- Reusing an old wax ring to save $4. Once compressed, a wax ring cannot reseal.
- Overtightening the closet bolts and cracking the bowl or tank.
- Skipping shims on an uneven floor, which causes the toilet to flex every time someone sits down, breaking the seal over time.
- Using a bent, kinked, or undersized supply line that restricts flow and stresses the connection points.
- Ignoring a slightly recessed flange instead of installing an extender.
Preventing these mistakes is far cheaper than repairing the water damage they cause. If your bathroom shares a wall with the kitchen or sits above a finished ceiling, the cost of a failed seal can climb quickly. Water damage from a toilet leak can also contribute to broader plumbing problems, including drain blockages caused by soil and sediment, especially if water seeps into cracks that let debris enter your drain lines.
When to Call a Professional
A straightforward replacement on a sound floor with a working shutoff valve is a reasonable DIY project for a confident homeowner. Some jobs, though, really do call for a licensed professional:
- Soft, spongy, or stained subfloor around the toilet
- A damaged, rocking, or broken closet flange
- Galvanized or corroded supply pipes that need to be replaced
- Moving the toilet to a new location (which changes the drain and vent layout)
- Any toilet that leaks at the base after a second wax ring attempt
For homeowners throughout the Levittown service area, these kinds of issues often reveal themselves only once the old toilet is out of the way. A professional can diagnose and correct them before the new fixture goes in, saving you from installing a brand-new toilet on top of an underlying problem.
Mineral buildup can also complicate an install by corroding the shutoff valve or supply line fittings. If you are not sure whether hard water is affecting your fixtures, it is worth reading about how hard water damages hot water systems and plumbing before you start the project.
Schedule Professional Toilet Installation
A correctly installed toilet should deliver years of trouble-free service. If you are unsure about any part of the process, or if you are working in the Willow Grove service area with older plumbing that needs evaluation before a new fixture goes in, our licensed team can handle the whole job from shutoff to final flush. Contact FKRIV Plumbing & Heating Inc. to schedule an installation and make sure your bathroom stays leak-free from day one.